I know that these are all over Pinterest at the moment, but I just wanted to show you how we made ours.
I love the idea of a growth chart. When I was a kid we used to make the marks on a door frame in our house, but we moved quite a bit and we had to leave the evidence of how much we had grown behind. With a growth chart I can take it with me and always have the visual of my kids growing up.
I loved the look of the ruler ones online and have been wanting to make this for the longest time. To be fair, I should have had this finished in time for Willow to start working, but better late than never.
A had some wood leftover from a previous project. We decided to stain it so that it fit in with the wood items we already have in our house and to make it look more like a ruler.
I’m really happy with how it has come out! Here’s what we did:
What you’ll need:
A piece of wood the size that you want. Ours is 1.5m and is left over from a previous project. It’s not as wide as I would have liked, but it works so I’m not too fussed.
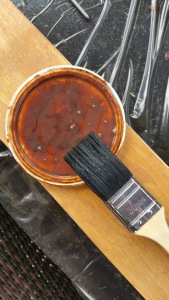
Wood stain and sealer – we used Sherwood Sealer in Teak. It’s meant for exterior use, but as we were using this to stain and seal my trellis for the garden we decided to use this for the ruler too.
Steel wool – we used this to smooth the surface of the wood to prep it for staining.
Rubber gloves – I used these to protect my hands when using the steel wool. It’s completely optional.
Paint brushes – for applying the stain
Oil paint pens – I used Sharpies. I highly recommend you get two different tips. The Extra Fine one was ideal for all the detail work I wanted to do and made filling in the numbers really easy. The Fine tip was perfect for making the inch and foot marks and making thicker marks where I needed them.
Paper and printer – to print out you numbers. This will make it so much easier.
Pencil – For transferring the artwork
Tape measure or metal ruler – for figuring out where to make the markings.
Step one: Buff the surface of the wood with steel wool. I didn’t get a photo of this but it’s pretty straight forward.
Step two: Apply first coat of stain to both sides. Let it dry
Step three: Rub down with the steel wool again
Step four: Apply second, coat of stain. Let it dry completely. We left ours overnight.
Step five: Print out the numbers you would like to use as well as any other artwork. I printed numbers and decided to combine another Pinterest wall art project I had seen – the Surname, founding date canvas thing. It took a bit of experimentation to figure out the right sizes I needed. I used Century Schoolbook for the numbers and After the Rain for the surname.
Step six: Trace over the back of the numbers and letters with a soft pencil. I found it helpful to do this against a window as a sort of make shift light box.
Step seven: Work out where to make your markings and where to put the numbers. We decided to work in feet so that we could put more numbers on the ruler without it being crowded. A helped me to figure out where to start and how high off the ground we will hang the ruler. I didn’t end up starting at 1 foot because our ruler will be hung 45cm off the ground. So my first number was two. I made the feet and half feet marks darker and thicker than the inch marks. I also made them a little longer.
Step eight: Lay out numbers on the wood the right way up and go over them with a normal pen. I found using tape to stick the numbers down then pressing quite hard worked well as it left a light indentation in the wood.
Step nine: Use your oil paint pens and a metal ruler to make your markings and fill in your numbers and letters. *If you mess up we found that the best way to clean up was to use a cotton bud and some nail polish remover. I assume rubbing alcohol will work just as well!*
Step ten: Admire your work and how well it is coming together!
Step eleven: Drill pilot holes into the wood. We decided to do so on all four corners because out piece is quite thin and we didn’t want any warping. Hang on the wall and start tracking how your child grows!


